Telemetry
The Xronos SDKs provide several mechanisms for collecting telemetry data to gain insight into an application.
Enabling Telemetry
An application needs to explicitly enable the collection of telemetry data by
calling enable_telemetry()
(Python,
C++)
on the environment .
This records trace data for each reaction handler that executes and collects all data recorded using Metrics.
For instance, you can modify the “Hello, World!” (Python, C++) example like shown below.
def main():
    env = xronos.Environment()
    env.create_reactor("hello", Hello)
    env.enable_telemetry(application_name="hello")
    env.execute()
auto main() -> int {
  sdk::Environment env{};
  HelloWorld hello_world{"hello_world", env.context()};
  env.enable_telemetry();
  env.execute();
  return 0;
}
Then execute the program.
$ python hello.py
Hello, World!
[Error] File: /xronos/xronos-telemetry/build/_deps/opentelemetry-cpp-src/exporters/otlp/src/otlp_grpc_exporter.cc:114 [OTLP TRACE GRPC Exporter] Export() failed with status_code: "UNAVAILABLE" error_message: "failed to connect to all addresses; last error: UNKNOWN: ipv4:127.0.0.1:4317: Failed to connect to remote host: connect: Connection refused (111)"
$ cmake --build build --target hello
$ ./build/hello
Hello, World!
[Error] File: /xronos/xronos-telemetry/build/_deps/opentelemetry-cpp-src/exporters/otlp/src/otlp_grpc_exporter.cc:114 [OTLP TRACE GRPC Exporter] Export() failed with status_code: "UNAVAILABLE" error_message: "failed to connect to all addresses; last error: UNKNOWN: ipv4:127.0.0.1:4317: Failed to connect to remote host: connect: Connection refused (111)"
This prints an error because we ran the program with telemetry enabled, but did not provide an endpoint for receiving the telemetry data. See Dashboard for instructions on how to start and use the dashboard for receiving and visualizing telemetry data.
Attributes
All elements within the Xronos SDK may be annotated with attributes. The attributes provide a mechanism for labeling the recorded data and provide a mechanism for filtering the telemetry data in the dashboard. By default, the following attributes are recorded:
host.name: Name of the host executing the Xronos program.process.pid: The process ID of the running Xronos program.service.name: Name of the application as given provided in the call toxronos.Environment.enable_telemetry().xronos.fqn: Fully qualified name of the element that produces telemetry data.xronos.name: Name of the element that produces telemetry data.xronos.element_type: Type of the element that produces telemetry data (e.g., “reactor”, “reaction”, “metric”)xronos.container_fqn: Fully qualified name of the reactor that contains the element that produces telemetry data.
This set of attributes is sufficient to uniquely identify the origin of each
datapoint. However, you may specify additional attributes that will help you
to better identify the data you are looking for. For this, each element
has an add_attribute() method (Python, C++) for adding a single attribute and
an add_attributes() method for adding multiple attributes at once.
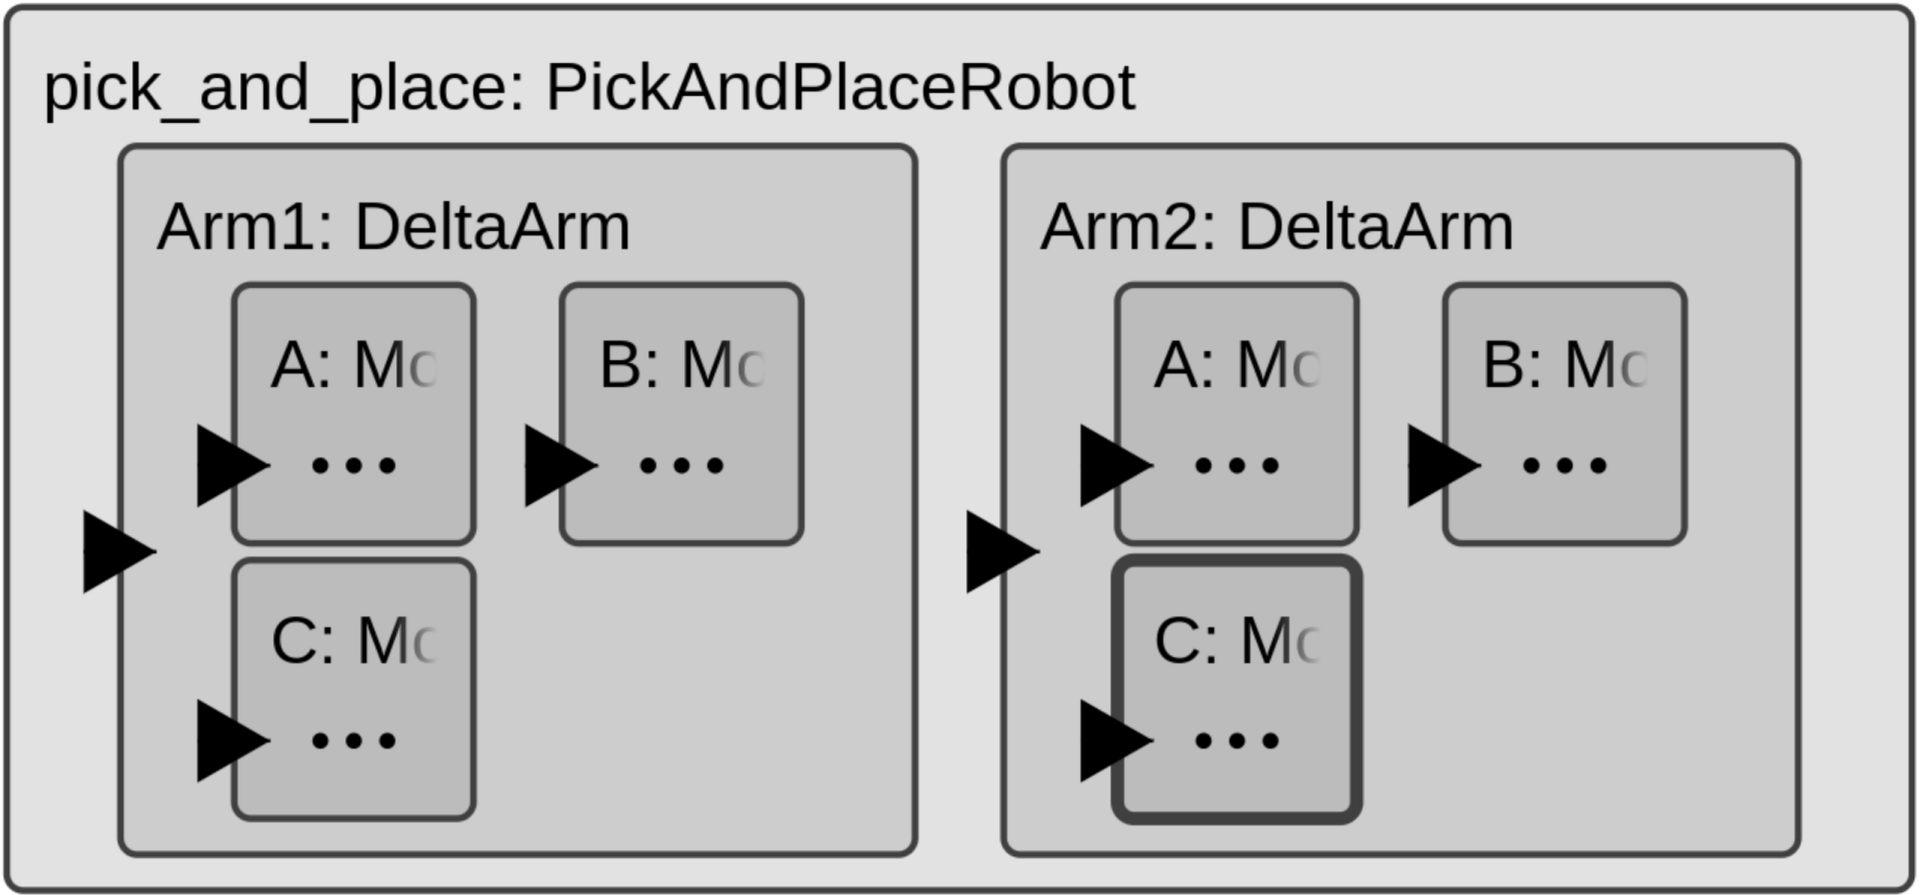
Each element inherits all attributes of the reactor that it is contained in. Consider the following simplified example program. It shows the structure of a control program for a pick-and-place robot that uses two delta arms, where each arm consists of 3 motors.
import xronos


class Motor(xronos.Reactor):
    angle = xronos.InputPortDeclaration[float]()

    def __init__(self) -> None:
        super().__init__()
        self.add_attribute("motor", self.name)


class DeltaArm(xronos.Reactor):
    pos = xronos.InputPortDeclaration[tuple[float, float]]()

    def __init__(self) -> None:
        super().__init__()
        self.add_attribute("arm", self.name)
        self.create_reactor("A", Motor)
        self.create_reactor("B", Motor)
        self.create_reactor("C", Motor)


class PickAndPlaceRobot(xronos.Reactor):
    def __init__(self) -> None:
        super().__init__()
        self.create_reactor("Arm1", DeltaArm)
        self.create_reactor("Arm2", DeltaArm)


def main() -> None:
    env = xronos.Environment()
    pick_and_place = env.create_reactor("pick_and_place", PickAndPlaceRobot)
    pick_and_place.add_attribute("location", "factory1")
    env.execute()


if __name__ == "__main__":
    main()
#include <string>
#include <string_view>

#include "xronos/sdk.hh"

namespace sdk = xronos::sdk;

class Motor : public sdk::Reactor {
public:
  Motor(std::string_view name, sdk::Context context)
      : sdk::Reactor{name, context} {
    add_attribute("motor", std::string{name});
  }

private:
  void assemble() final {}
};

class DeltaArm : public sdk::Reactor {
public:
  DeltaArm(std::string_view name, sdk::Context context)
      : sdk::Reactor{name, context} {
    add_attribute("arm", std::string{name});
  }

private:
  Motor a{"A", context()};
  Motor b{"B", context()};
  Motor c{"C", context()};

  void assemble() final {}
};

class PickAndPlaceRobot : public sdk::Reactor {
public:
  using Reactor::Reactor;

private:
  DeltaArm arm1{"Arm1", context()};
  DeltaArm arm2{"Arm2", context()};

  void assemble() final {}
};

auto main() -> int {
  sdk::Environment env{};
  env.enable_telemetry();

  PickAndPlaceRobot pick_and_place{"pick_and_place", env.context()};
  pick_and_place.add_attribute("location", "factory1");

  env.execute();

  return 0;
}
The pick_and_place reactor has an attribute “location” that can be used to
identify the location that the robot operates in. Here it is set to “factory1”.
This attribute will also be added to any reactor and element contained within
pick_and_place. The DeltaArm reactor additionally sets the “arm” attribute
to its reactor name. Finally, the Motor reactor sets the “motor”
attribute to its reactor name. Consequently, the reactor
pick_and_place.Arm1.B has the following attributes:
“motor: “A”
“arm”: “Arm1”
“location”: “factory1”
This makes it convenient to filter telemetry data. For instance, it lets us show all data matching a specific location or show data relating to a specific motor, independent of the concrete arm and location. See Visualizing Metrics for instructions on how to filter telemetry data.
Note that the same attribute may not be added twice for the same element. Once an attribute is added, its value cannot be changed. However, it is possible for contained elements to overwrite attributes that are defined higher in the reactor hierarchy.
Metrics
Metrics provide a convenient mechanism for recording information about the
system’s state. Metrics are declared and used similarly to all other reactor
elements. Consider the following example, which extends the Motor reactor from
the Attributes section so that it has a metric current, which
is used to record the current measured on the motor.
class Motor(xronos.Reactor):
    angle = xronos.InputPortDeclaration[float]()
    _timer = xronos.PeriodicTimerDeclaration(
        period=datetime.timedelta(microseconds=500)
    )
    _current = xronos.MetricDeclaration(description="Motor current", unit="mA")

    def __init__(self) -> None:
        super().__init__()
        self.add_attribute("motor", self.name)

    @xronos.reaction
    def control(self, interface: xronos.ReactionInterface) -> Callable[[], None]:
        interface.add_trigger(self._timer)
        current_effect = interface.add_effect(self._current)

        def handler() -> None:
            current_effect.record(read_current())
            # do control

        return handler
#include <chrono>
#include <cstdint>

#include "xronos/sdk.hh"

namespace sdk = xronos::sdk;

using namespace std::literals::chrono_literals;

static auto read_current() -> std::int64_t { return 50; }

class Motor : public sdk::Reactor {
public:
  Motor(std::string_view name, sdk::ReactorContext ctx)
      : sdk::Reactor(name, ctx) {
    add_attribute("motor", std::string{name});
  }

private:
  sdk::InputPort<double> angle_{"angle", context()};
  sdk::PeriodicTimer timer_{"timer", context(), 500us};
  sdk::Metric current_{"current", context(), "Motor current", "mA"};

  class ControlReaction : public sdk::Reaction<Motor> {
    using sdk::Reaction<Motor>::Reaction;
    Trigger<void> timer_trigger{self().timer_, context()};
    MetricEffect current_effect{self().current_, context()};
    void handler() final { current_effect.record(read_current()); }
  };

  void assemble() final { add_reaction<ControlReaction>("control"); }
};

auto main() -> int {
  sdk::Environment env{};
  Motor motor{"motor", env.context()};
  env.execute();
  return 0;
}

When declaring a metric, a description needs to be provided and optionally a unit can be set:
_current = xronos.MetricDeclaration(description="Motor current", unit="mA")
sdk::Metric current_{"current", context(), "Motor current", "mA"};
In the example above, the control reaction executes every 500 microseconds. It
reads and records the measured current using record()
(Python,
C++). The control algorithm is
omitted from the example.
See Visualizing Metrics for instructions on how to visualize data recorded from metrics.